Things I Wish I Knew Then

Welcome to one of the loudest and most dynamic instruments there is – the drums. Starting my journey over 20 years ago, I am here to share with you some of my tips, tricks, and tools that have helped give me a truly rewarding experience through this percussive machine.
Outside of banging the pots and pans in the kitchen in my youth, my learning began in high school where I became fully enveloped in music. I listened to music daily and met new people with completely different music tastes in a school with a supportive music program.
When I finally convinced my parents to buy me my first drum set, I got it home, opened the box, and was immediately hit with my first challenge – “How do I set this up??’” Thankfully, Future Kyle is here to help guide you along with some of that process!
Setup & Ergonomics
- Starting with the throne, you want to try to sit on it with your legs bent at approximately 90 degrees. Lower is more difficult on your body, especially your legs. Too high, and you will have to rely on your core balance to keep stabilized.
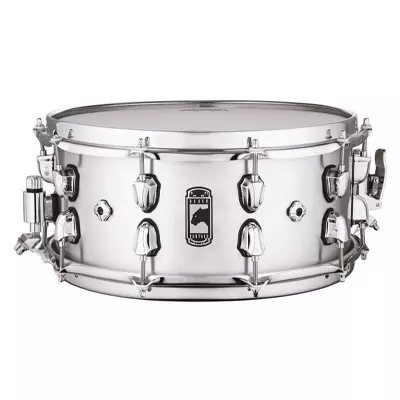
- Set the snare next. It should fit comfortably between your legs with enough space to move your legs for the bass drum pedal and hi-hat pedal. Where your bass drum foot rests is exactly where the pedal should be, and same with the other foot, for the hi-hat.
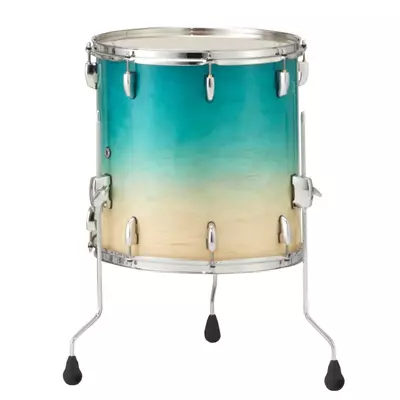
- The type of bass drum or drum kit will determine the placement of the rack toms. The floor tom should be separate and able to be placed on the other side of the bass drum leg – easy to reach like the snare. Heights of the snare and floor tom should be just over the thigh level of your legs. Rack tom height is determined by the setup; a logical step up is a few inches from the snare. That should keep it close enough for rolls without making it a big stretch to hit them.
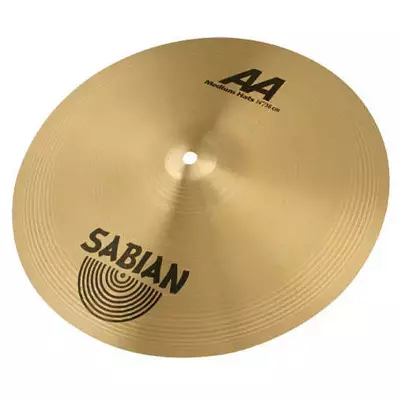
- The needs enough clearance for you to utilize both hands with the snare, so they don’t interfere with each other. Crashes should be up and out of the way of the toms, but not too far where you must stretch or move to reach them. Too close may cause you to hit them while trying to play your toms. The ride cymbal is effective over the bass drum – but not all setups can accommodate this. Finding a placement and angle that will fit between the vertical height of your rack and floor toms will help.
STICK SAVING TIPS – Slightly angle down your crash cymbals. This avoids digging into the edges with every hit. Flattening out your toms will reduce the stress angle of the hit to break less sticks. The size, type, and weight of your sticks can also determine durability, but can also impact longevity on your kit components. The number one reason for broken cymbals is that they are too tight. Loosening them to make them swing more freely will give you the full intended sound of the cymbal and reduce the pressure points that cause cracks. Learning how to play with loose cymbals will also help improve your technique.
YOU GOTTA BREATHE! – Holding your breath when playing fast or hard will only make it difficult. Gasping for breath will slow you down and make you lose your focus. Working on your core strength and balance is essential for four-limb interdependence and will help you improve. Loosen your grip – you don’t have to hit so hard or involve your whole arm into every hit; wrist and grip control makes a big difference on your playing.
Once that daunting first task was complete, I began taking lessons from a fantastic local music teacher. However, I discovered that everything I was trying to play at home didn’t sound right or sound the same as it did on the drum set in the lesson room. I consulted him; he introduced me to what was a scary concept – tuning. And due to the modern marvels of technology, Future Kyle is here to help shed some light on this process.
Tuning
Toms & Bass Drum
- Personal preference and the genre of music will influence tuning. In MY setup, my toms are as low as possible in pitch, just above that plastic warble that you hear when they are just too loose. HOWEVER – I tune them all the exact same. It is the actual physical sizes of the drums that make the difference in pitch.
Resonant Tom Heads
- There are three schools of thought on this – tuning it higher than the batter will cause the pitch to bend up, giving the toms more ring. Tuning it lower than the batter will cause the pitch to drop and decay faster. Tuning it the same will keep the note in unison and ring out longer. My personal preference is the same, so you can hear the intended note ring out.
Snare
- For a bright and crackly snare, tune it up high – for more beef; tune it lower. For the resonant head, keep it the same, so you don’t lose the sensitivity that the wires give you. The higher the snare, the more overtones or “ringing” you get, especially with steel snares. But you have lots of rebound from the drum. The lower tuned the snare, the more effort you need to hit it. Things such as rolls may feel “dead”.
Dampening Crutches
- Moongels or tape may make your drums sound better by getting rid of overtones; but they can suck the life and sensitivity out of your drums if not used sparingly or properly. Spending the time to fine tune your drums can go a long way before you add any external dampening. Remember that if your reference is studio recordings, live drums will not sound the same. That sound you are trying to achieve is through studio editing and tweaking.
- We’ve got what you need! Moongel Damper Pads (6 pcs) | sku 489597 | $10.99
Helpful Devices
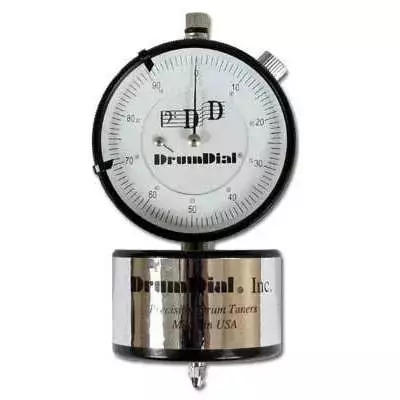
- A drum dial takes the guesswork out of getting your head in tune; you won’t need to hit and hear it until you fine tune at the end, and it will save a lot of time in trying to count turns or losing track of what lug you are on.
- We’ve got what you need! Ahead Drum Tuner | sku 85132 | $95
- Snare weight dampening can be flipped on and off to give effect on the fly, and shape the sound of your drums between songs. Unlike moongels, they won’t get dirty and fall off, or need a spot to stick them if you want them on and off the drum.
- We’ve got what you need! Snareweight Drum Dampener | sku 738273 | $24.50
I was finally starting to get somewhere. I could comfortably play my drums, and they sounded like drums. But I was feeling a little bored playing the same thing repeatedly that my teacher asked me to do for the week. So, I simply did what felt right at the time; put on my headphones, pulled up my favourite song or band I was listening to at the time, and tried to play along with those songs.
It helped; but, due to some of my music choices, the drum parts were too difficult or complex for my skill level, leaving me feeling defeated and frustrated. Future Kyle will now help show what I should have done when I was feeling this way.
Beat Layering
- Beat layering is a technique that I use to take existing beats/patterns and find ways to modify the playing – by adding or reducing parts to further enhance the experience of hearing the part performed. The goal isn’t to “show off”, but rather to find unique ways to differentiate repetitive playing. It can be used to keep the beat the same while changing your playing surfaces to give it a completely different sound and feel. Combining two existing beats can be a differentiation for a highlight point of a song.
- Taking a simple beat played with 1/4 notes and speeding up the cymbal work to 1/8 notes, or adding little flairs or flourishes on the hi-hats can break the monotony of simple playing. The difficulty can then be tested by going back and forth on the changes you made with a seamless beat. This helps improve your internal clock and ability to adapt.
- Picking a difficult song on your first attempt can be chipped away at – listen to the bass drum, nothing else. Then start to copy that drum’s pattern. This will help you get the tempo of the song. Next, consider the snare to help get your off-beat or accents sorted. With practice and confidence, gradually add other parts/arms – including cymbal work or fills until you build up into the performance of the song. This may take many passes through the song, though it can be achieved quicker than trying to play everything all at once.
After several broken drumsticks, drum heads, and worn out ear plugs - along with my wonderful parents’ patience being worn thin from all the ‘racket’ - I needed to figure out what I was doing wrong. And all it was, is I was playing too loudly.
It wasn’t really until I matured as a percussionist that I discovered the idea of dynamics. “You mean you are intentionally playing quietly?” – yes. And not necessarily for the reason you think. It does way more than save ears and sticks; it helps expand your quality and style of music significantly.
Dynamics
- Dynamics is the volume you project from the drums, directly related to the force applied to each hit. Controlling this aspect can greatly improve your playing ability. Dynamics also refers to starting, stopping, and pauses. These can give distinction when the overall volume of what is being played doesn’t change. Think of the way you want the drums to be heard if you were the listener in the audience.
- The impact it has on your performance - dynamics that don’t match the genre or environment for which they are required - is immediately noticed. Blending in the drums so they sound and feel a part of the music is crucial. Think of a band playing along live, but the guitarist only then turns his amp up twice as loud, and nothing else changes.
When I was (finally) making better noise, I started talking with my friends at school. We chatted about the instruments and music we were learning. We came up with a totally original idea of all playing together in a group….”Group?” - let’s call it a band instead!
We had no idea what we were doing at the time. Randomly playing notes to see what we could fit together and learning how to copy the songs by other bands was one thing, but how do we make our own music? We tried; it was… something… but we all learned from the process. With more experience on this, Future Kyle is back to the rescue.
Playing With Other Musicians
Feel It Out!
- My approach is to sit and listen first. I try to form a beat in my head that may work, or play along softly with only the bass drum or snare drum. Getting a creative idea for a song can take time; it will evolve as others are playing along with the music, and constructive feedback is provided.
Work Together
- A band works together – there should be no lead player or special instrument. A fair band will give everyone their own individual time to shine. A great guitar solo won’t work if other members are trying to compete or play over top of it. Gigs are a test; the success of the band is marked on your punctuality, professionalism, etc. So, TREAT GIGS LIKE A JOB! When you don’t practice your parts, hold up your end of the work, become unreliable, or do something that can be reflected poorly on the band, you will see a band ready to move on without you.
Songwriting Styles
- Some people have a full song - with how they hear the other instruments all planned out - in advance and present their material in one go. This can be advantageous to have a quick turnaround on a song. Others will have an idea formed and shape it while playing along. This can generate many ideas while playing. And some just like to jam it out, start with nothing or a simple riff/melody line, and build the song around it. This method can take the longest, but has the most creative input from all members.
Expand Your Repertoire
- Don’t focus on one genre or style of drum playing. Rock beats do not work with all bands you play with. Experimentation with an unexpected beat or style within a song gives a unique spot or differentiation to some music – if it works. Think of your beats like a deck of cards; the more you have, the more you use to make a pair with the music.
How Dynamics Help
- Giving time and volume to other members can give them the opportunity to shine in a specific spot of a song. Or let the creative process happen smoothly so you are not playing too loudly over others while they are figuring out their parts and may not be able to hear for song cues. Quieting down, going louder, speeding up, slowing down, and pausing are all fantastic elements that can give songs dimension. This breaks the monotony of repetitive playing or can help a member focus when their part is lost on the audience.
Syncopation
- This is one of my absolute favourite things – especially in a two-piece band: Finding the notes and parts to sync up with your band mates, making the audio and accents match up, and giving an emphasis on making the notes hit together. You’re basically selling that aspect of the song to the audience.
I hope that this information can help you along with your journey by speeding up the process and skipping the first hurdles I had when I began. This can help maximize your time playing on the kit by yourself, with a teacher, or with others. Technology, video recording, social media sharing, and online courses have improved over the last 20 years; however, nothing beats the skilled hands of an instructor teaching you one-on-one, with direct feedback as you play. And most importantly, enjoy the journey and HAVE FUN!
Kyle is a Sales & Rental Associate specializing in the drum department at the Kingston, Ontario location. Currently performing in two bands - Days of Thieves and Master Nate & The Reprobates - he has recorded several albums and recently returned from an international tour covering Canada, Costa Rica, and Australia.
Kyle wishes to thank his parents for getting him started with his instructor Andrew Trott, all the musicians he has been in bands with, his managers Paul and Nathan for giving him the ability to share his craft at the store, and all the bands and artists he has shared stage and studio with over the years.
If you are interested in taking lessons to learn how to play the drums, visit your local store’s lesson centre to find out their wide resource of skilled instructors ready to teach you or your child today. More information can be found at www.long-mcquade.com/lessons/.


